Table of contents
Setup
Login
- Go to: https://maestro.listserv.umd.edu/lui and log in.
- The User Name is the same as your Directory ID, but the password will be different.
- Under Group, enter the group name that the administrator has given you.
- Once you have authenticated, you will see the welcome screen.
On all screens, help documentation can be accessed by clicking on the icon in the upper right-hand corner. The complete documentation can be downloaded from L-Soft Documentation and Manuals.
Change your password
After logging in the first time, the system will automatically prompt you to change the password provided to a unique value.
To change your password while logged in:
- Click your username in the upper right corner of the screen.
- Select Change Password.
Or you can contact the IT Service Desk (301.405.1500, itsupport@umd.edu) to set a password to a one-time value which you'll be prompted to reset.
Mobile app
Starting with a Maestro 9.0, the application is optimized for the smartphones/portable devices.
Setting preferences
- Click the down arrow button next to LISTSERV MAESTRO menu.
- From the Utility menu you can set the Notification Service, Personalized Contact Data, and Recipients Action Tracking Settings:

Reports
- Click the down arrow button next to LISTSERV MAESTRO menu.
- Reports
- System Reports.
The User-defined Reports have a bug in the version 10.0-2 that we currently have. We have a solution from the vendor and we tested it out and it's fixing this bug and we will schedule to implement the bug fix after the 2021 winter break.
Content templates
- Click the down arrow button next to LISTSERV MAESTRO menu.
- Content Templates.
You can create your own or choose from the system templates. You can choose a template from the System Templates, right click on the template, choose Based on the System Template, modify it as you wish, and click Save and Close.
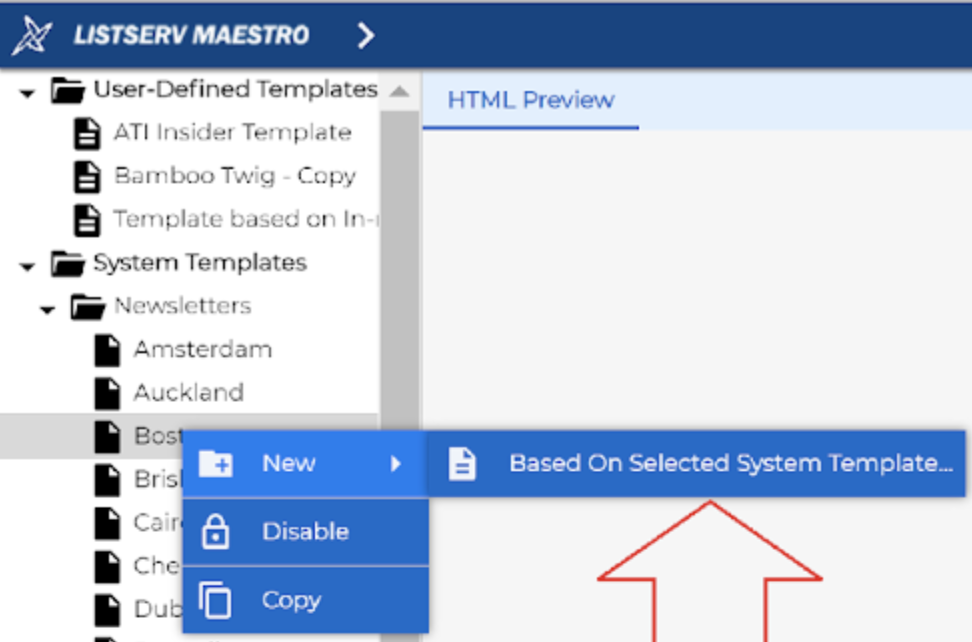
Your template will be save as a [Name of the System Template] – Copy.
- Right click on the template and rename it.
- Right click again
- Select Enable.
Mailing recipients datasets
Instead of uploading a .csv or .xlsx MS Excel files to each job, you can create a Subscriber List, upload the recipients from the MS Excel file to it, and use it for your mailing jobs.
- Click the down arrow button next to LISTSERV MAESTRO menu.
- Select New.
- Click Subscriber List.
The wizard is a self-explanatory on how to create and configure a subscriber list.
Create a mail job
Step 1: Create a new mail job. Define recipients
- To launch the job creation wizard, click the down arrow button next to LISTSERV MAESTRO menu.
- Right click on Mail Jobs.
- Select New in Folder > Standard Mail Job.
- In the pop up box that appears, provide a name for the mail job and if you prefer an ID Prefix.
NOTE: The prefix is not a mandatory but can be used later to help organize and search for your completed jobs.
For example, I have created a Dr. Smith mailing for XYZ event that has a prefix of Smith-XYZ which I chose to indicate that it is a test massage. Click OK to continue. You will then see:
- A box which is highlighted is a next task which need to be completed; all boxes that need to be addressed have a Pending status.
- Boxes in white are the completed tasks; boxes that are grayed-out are tasks which cannot be completed until one or more previous tasks are completed
- The first task is to define recipients. Click on the far left hand rectangle that looks like the one below and define a group of recipients.
- By default it will show the pre-defined Subscriber Lists, if you have any.
- If you do or don't want to use the recipients from MS Excel of a .csv file, click Click here to change on the option on the bottom of the screen to choose another Source.
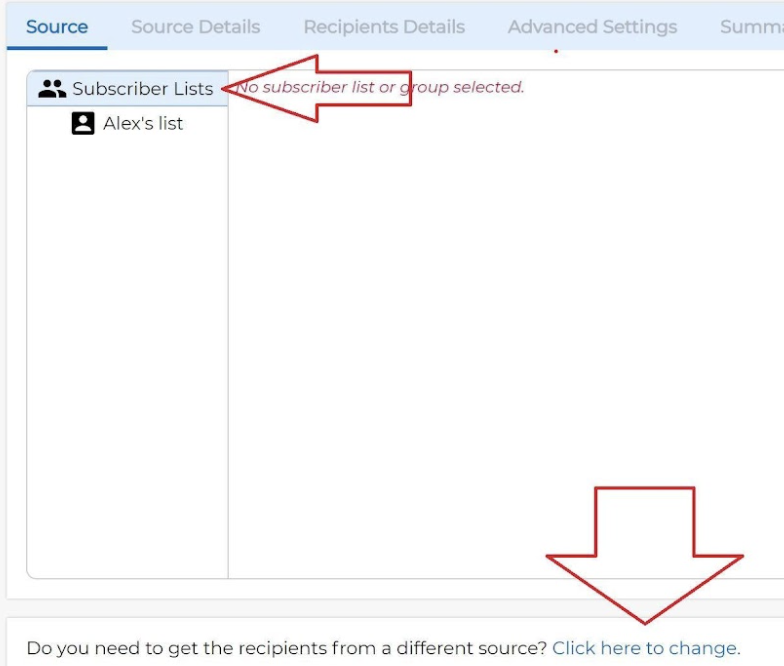
- If you do or don't want to use the recipients from MS Excel of a .csv file, click Click here to change on the option on the bottom of the screen to choose another Source.
- For this example, I am selecting Send to a Recipient Target Group and clicking on OK. Alternately, one can select Upload Recipients to supply a one-time list of recipients.
- There are few categories of recipients to choose from. One is UMCP which contains all of the megamail lists as seen below.
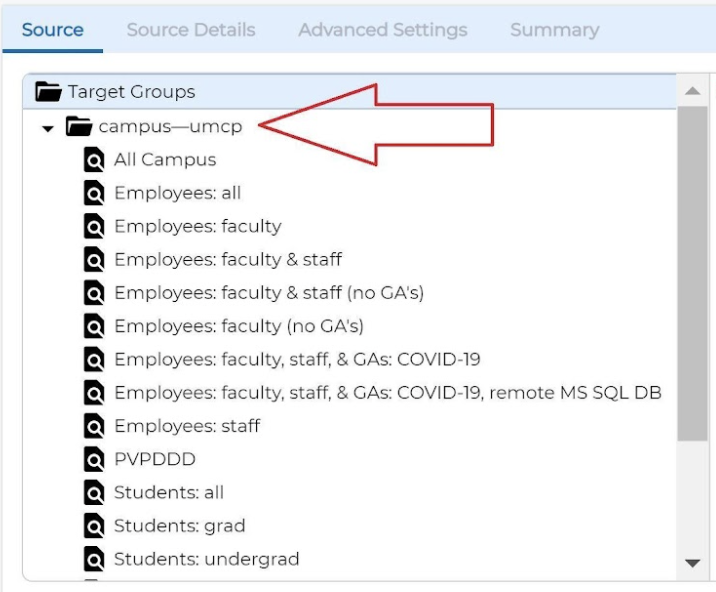
- The other and test folders at the bottom of this list are test mail groups. The maestro admins group sends email to the middleware team and the single user sends mail to one individual based on their Directory ID.
- For this test, I expanded the test group and selected the maestro admins and then clicked Next.
- You will then have a chance to verify that you have selected the correct target group:
- Click on Finish to complete this step. Completed steps can be easily identified by their white color and a Complete status.

Step 2: Define Email Content
- Select Define Email Content box.
- Specify the Subject for your mass mailing and click on Open Template Library button.
- If you want using a template, select a desired template to be used in your message. With a template you would need to specify the Subscription List name and provide Subscribe and Unsubscribe links.
- If you don't want using a template, choose No Template tab. Choose an option if you want to compose a message in HTML format, a just a plain text message, or if you'd like to upload a file from an External Editor application.
- Click OK.
- Compose your message. In case you'd like to compose an HTML message with different fonts and font colors, URL hyperlinks and etc, choose the HTML Content, WYSIWYG Editor. Enter the Subject line for your mailing and the body of the email.
NOTE: There is a difference between a Name of the Job and the Subject of the email that you need to enter. The Name of the Job is a name with which the job is stored in Maestro; but the Subject is what your end users will see for the email that you are sending from Maestro in their inbox.
Note: If the HTML version of the message is chosen, Maestro will automatically add a plain text version of the message as you type. When mailing the message out, Maestro detects if the recipient mail client not supporting the HTML and sends the plain text version of the message.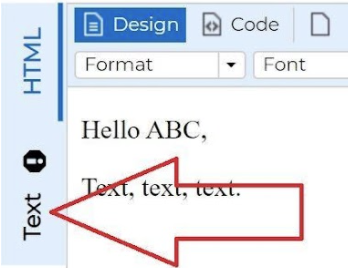
- If there is an attachment, then select the Attachments Change and click on Add Attachment and select the file to upload.
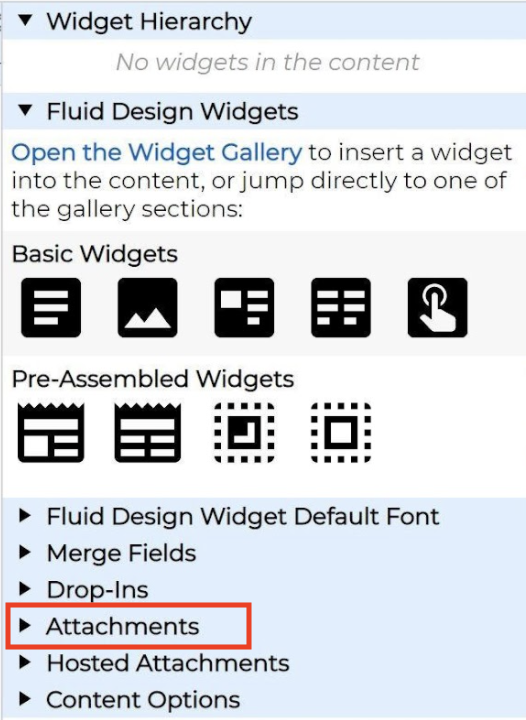
- Once you finished with the message and attachments (if any), click Save and Close.
- The Define Message step should now appear in the completed state.
Step 3: Define tracking (needs to be done only once)
Once you have sent at least 1 mail job from the maestro, the tracking will be already defined. To confirm/change the settings, select Define Tracking.
Make your choice if you want all, partial, or no tracking for the mail job and follow the Wizard. Click Finish.
NOTE: You now have three boxes Completed with white background.
Step 4: Define sender
The next step is to specify what appears in the From header of the message by selecting Define Sender:
Predefined senders can be selected from the Profile pull-down menu or the sender can be defined by filling out the form. The Email Address can be something like no-reply@umd.edu and the Sender Name can be descriptive such as Office of the President.
New sender profiles can be created under the Utility menu New Sender Profile… option. You should see the following items when completed.
Step 5: Schedule delivery
- Select Schedule Delivery to specify when the job should run.
NOTE: Jobs will never run until after the final Authorization step. - There are three options to choose from.
- Immediately….: as soon as authorization is completed
- Wait…: after authorization, someone will need to manually trigger delivery
- Schedule…: at the specified time and date
- When you are satisfied with the settings, click the Save button.
Step 6: Send test emails
- To verify the appearance of the message. Select Send Test Emails.
- In the smaller blue box, add the email address(es) to which you want to send a test copy of the email and then click on the Send Test Emails Now button.
- You will be taken to the next screen.
- Once you have received and verified the test email(s), select the YES option and click the OK button.
Step 7: Authorize delivery
- Select Authorize Delivery to provide final approval of the job.
- You will be presented with a summary of the job settings which should be carefully reviewed.
- If you wish to change a Delivery Notification/Statistics recipients, click the Change to choose other recipients from the list provided.

NOTE: The delivery notifications will/will not be sent in according with the settings you have/have not configured for the notifications for your profile. The default is: to send both notification and statistics email on the job. - Once satisfied, click the Authorize Delivery Now button.
- A pop-up window will appear. Once the job is being executed for delivery you will get a confirmation screen:
- Click OK to be directed to the Mail Jobs screen.
Mail jobs overview screen
- To get to the overview screen, click the down arrow button next to LISTSERV MAESTRO menu.
- To see the Completed Jobs, close the Open Jobs.
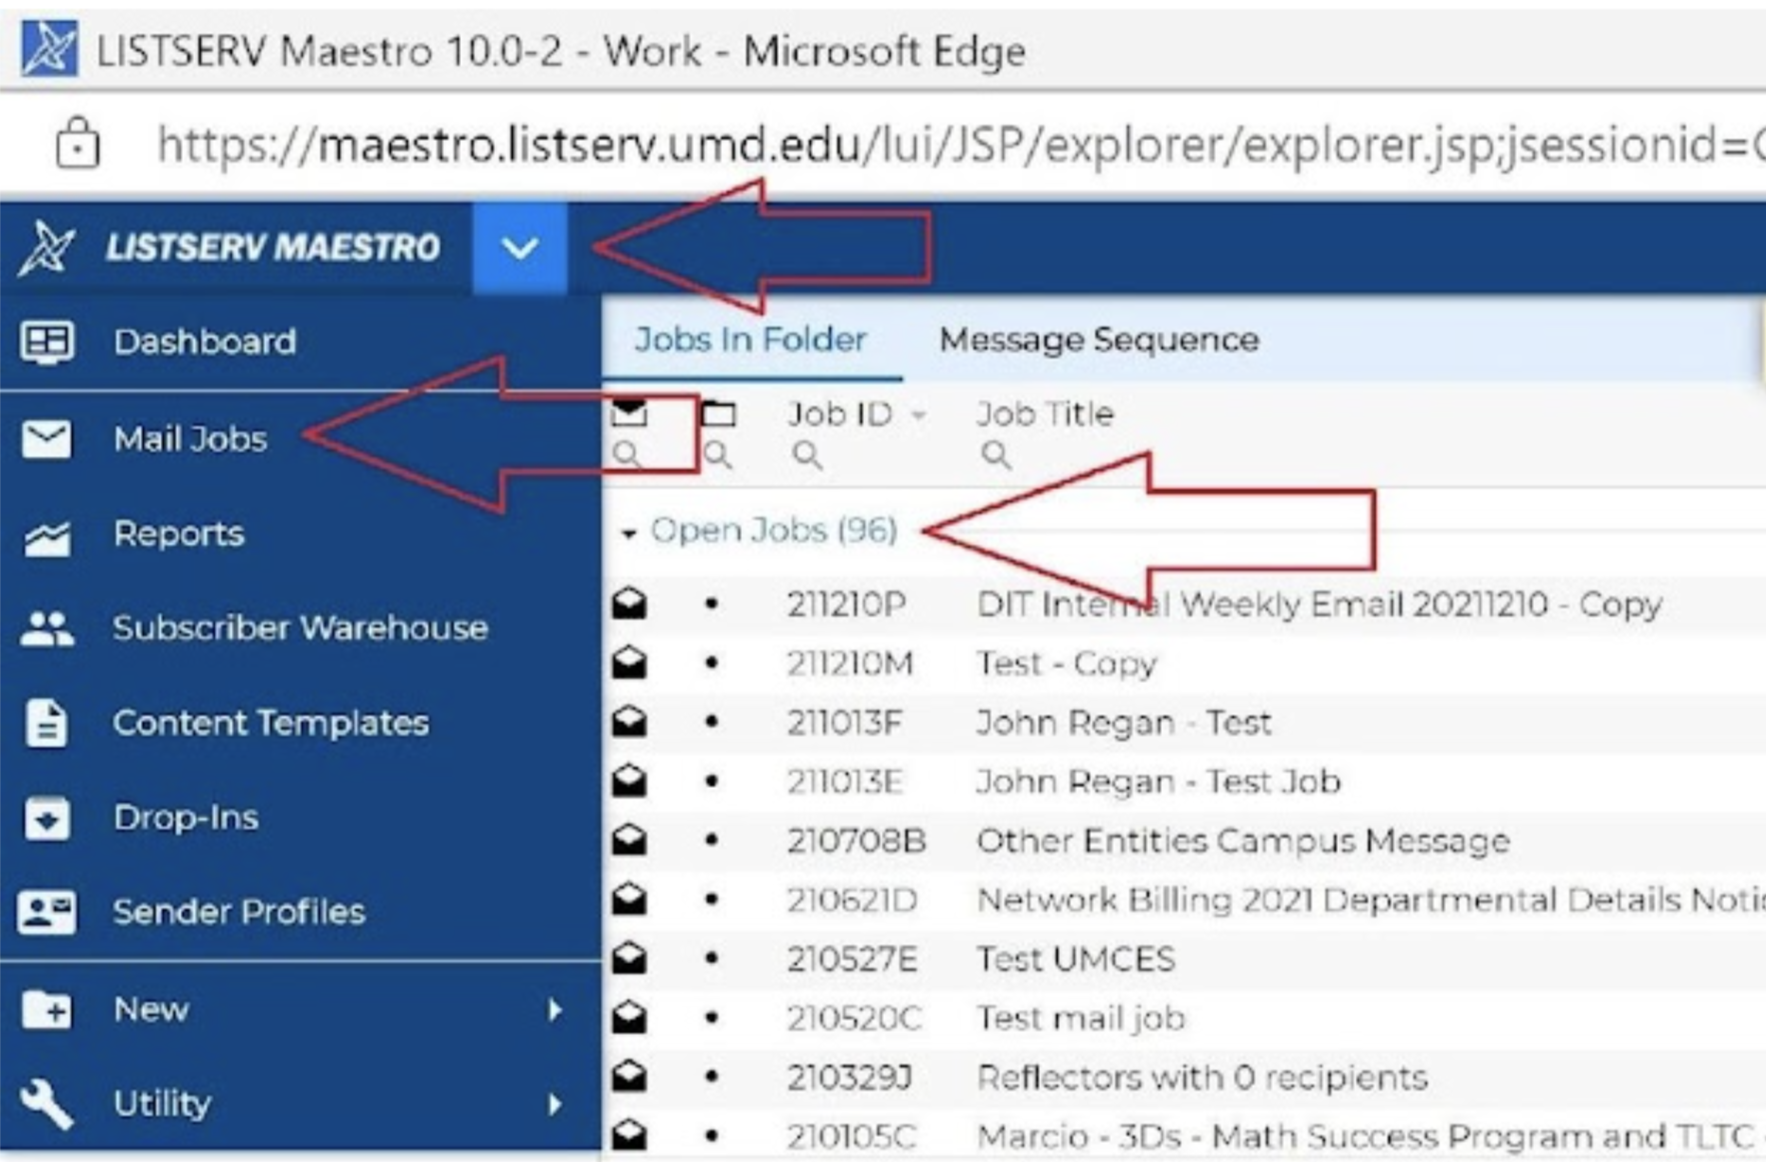
- The middle pane shows your jobs (which can be dragged over to your newly created folders).
- The Open Jobs tab has jobs where the job definition is incomplete.
- The Ongoing Jobs tab has jobs which are in the process of being delivered, awaiting manual triggering, or have failed.
- The Complete Jobs tab has jobs which have been completed.
- Selecting a job will show 3 tabs in the lower portion of the window: Content, Summary, and Overview Report
- There is a number of choices available when you right-click on a selected job:
NOTE: The Create Copy Of Selected Job link—this is a handy way to simplify the creation of a new job based on an existing job.
Job email notifications and reports
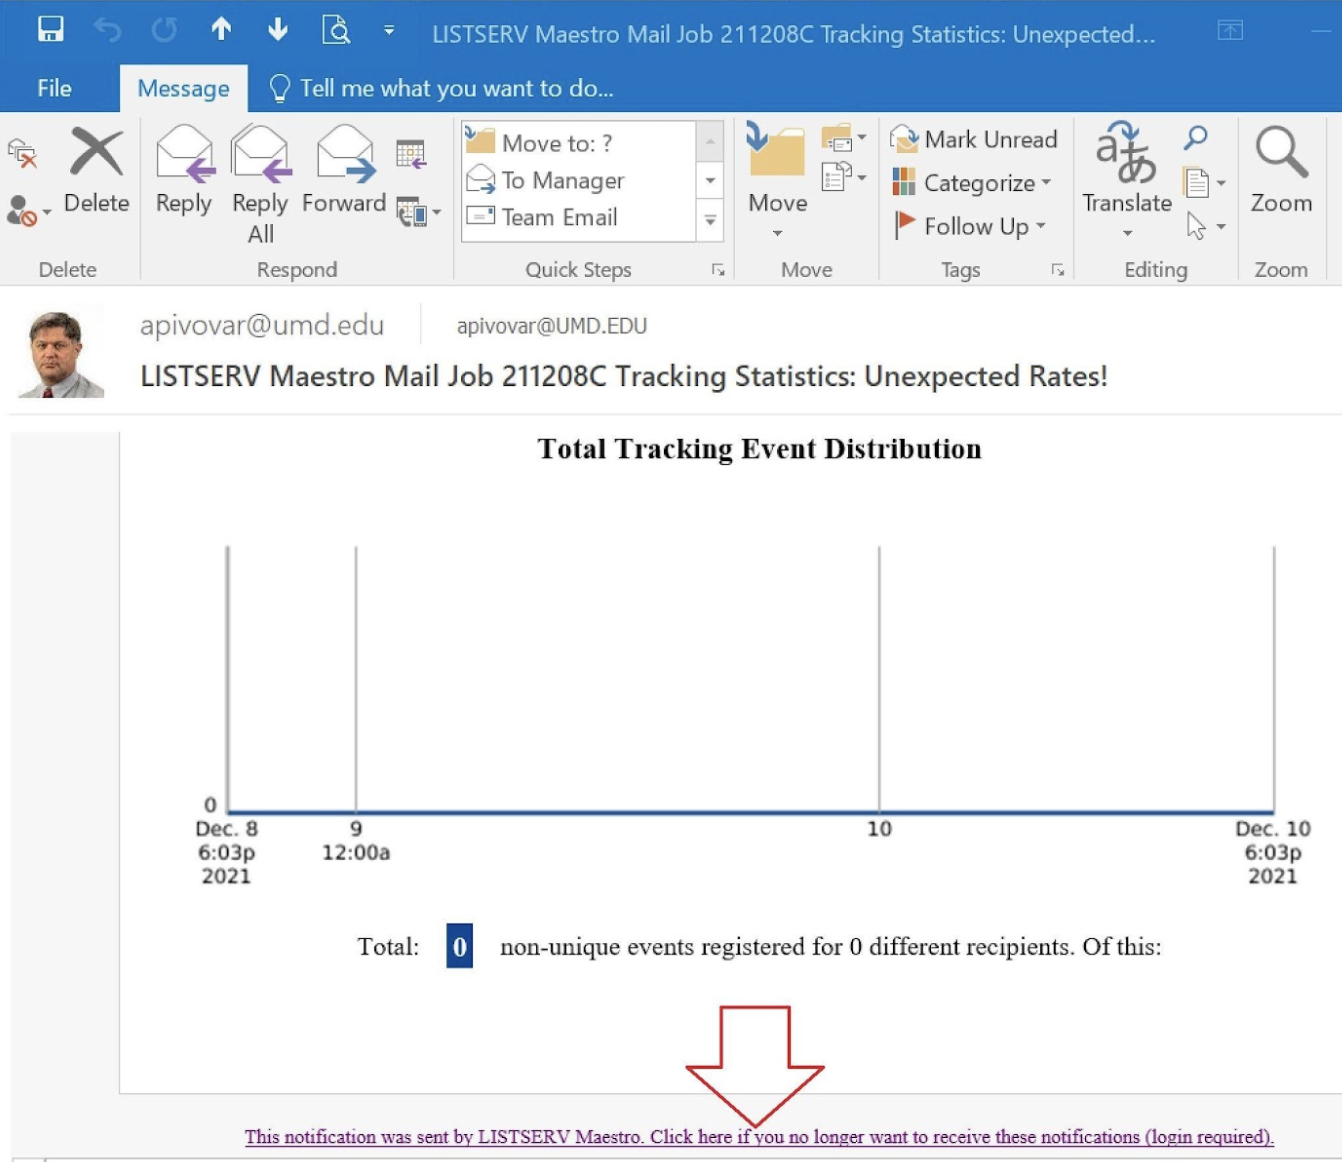
The Maestro by default will send over the job delivery and stats notifications and reports to the job owner. These notifications can be unsubscribed by a link in the bottom of the email that reads This notification was sent by LISTERV Maestro. Click here if you no longer want to receive these emails. (login required).
Log out
To get logged out from Maestro, click on your username in the upper right corner of the window and choose Logout.
Steps overview
- Define Recipients.
- Define Email Content.
- Define Tracking (once).
- Define Sender.
- Schedule Delivery.
- Send Test Emails.
- Authorize Delivery.
Further documentation
L-Soft has extensive documentation available at Maestro Help page.