- Designate project Blueprint Course Administrator (BCA).
- Complete Request for Administrator Access to Enterprise Instructional Technology Systems form by selecting the ELMS-Canvas option then selecting Deputy then selecting Blueprint.
- Request a training consultation by emailing itsupport@umd.edu.
Complete the basic workflow for a Blueprint Administrator by following the steps below:
- Use the Create Organizations tool in the ELMS Management Tools (EMT) in order to create a Master Course space. You can also re-purpose an existing Master Course space by following the steps below. Please Note: Before moving your Master Course space into your department or college sub-account make sure to add the individuals you would like to help create the content for the associated courses. After moving your Master Course space into your department or college sub-account you will no longer be able to add people into your Master Course space.
- Move the Master Course space to your department or college sub-account on the Settings page, in ELMS-Canvas.
- Develop the Master Course space, either from scratch or by importing existing content from another ELMS-Canvas course space.
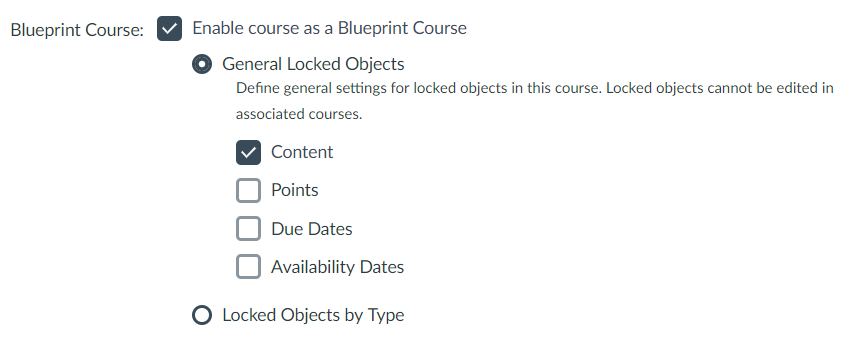
NOTE: There can be no one enrolled as a student in this Master Course space. - Designate your Master Course as a Blueprint course by going into the Settings on the course menu. Under the Course Details tab, click the checkbox to Enable course as a BluePrint Course. As you develop assignments, quizzes, pages, modules, and the like, you will have the option to Lock content that should be un-editable when pushed to the term-based associated courses. To lock specific objects by content and their respective features (ie. Content, Points, Dates, etc.) Select Object locked by type and select the appropriate settings. To save the changes in Course Details select Update Course Details at the bottom.

Important: Locked vs Unlocked Content
Locked Content

Locked content can NOT be changed by owners of associated course spaces, and will stay in sync with the Blueprint Master Course space at every sync.
Unlocked Content

Unlocked content will ONLY be synced once. When the content is changed in the associated courses, syncs from the blueprint will NOT update. An exception rule will display in the sync history. Owners of the associated course spaces will be able to edit unlocked elements. Unlocked content is suitable for due dates, grades, etc. However, content can be locked or unlocked at any time.
- The Master Course will now have a Blueprint icon menu in the upper right-hand corner of the page. Once this appears, select Associations from the menu options. Select the caret to reveal course(s) in the sub-account with which the Blueprint course should be associated. Use this menu to add Associations to all courses that should mirror the Master Course space.
- Making an association will cause the Master Course to sync with the associated courses; from this point forward, changes will be pushed to associated course spaces only when you manually trigger a sync via the Blueprint menu in the Master Course space. On each sync, all locked content will be synchronized. However, the unlocked content will not be changed. Existing content in associated course spaces will be left intact; syncing only adds new content to a course.
As of July 28, 2020: Making an association will cause the Master Course to sync with the associated courses. From this point forward, changes will be pushed to associated course spaces only when you manually trigger a sync via the Blueprint menu in the Master Course space. On each sync, all locked content will be synchronized. However, the unlocked content will not be changed. Existing content in associated course spaces will be left intact; syncing only adds new content to a course. Blueprint administrators can also Publish associated courses as part of the syncing process. Click on the Publish associated courses checkbox to do so.
